MarineroKnots › Cleat hitch

Free guide · no account

How to tie a cleat hitch

A cleat hitch makes a line fast to a cleat: one full turn around the base, two figure-of-eight crossings over the horns, then a locking turn that jams the tail under itself. It holds under heavy, changing load and still releases in one flip. It is the most-tied knot on any boat — dock lines, halyards and fender lines all finish this way.
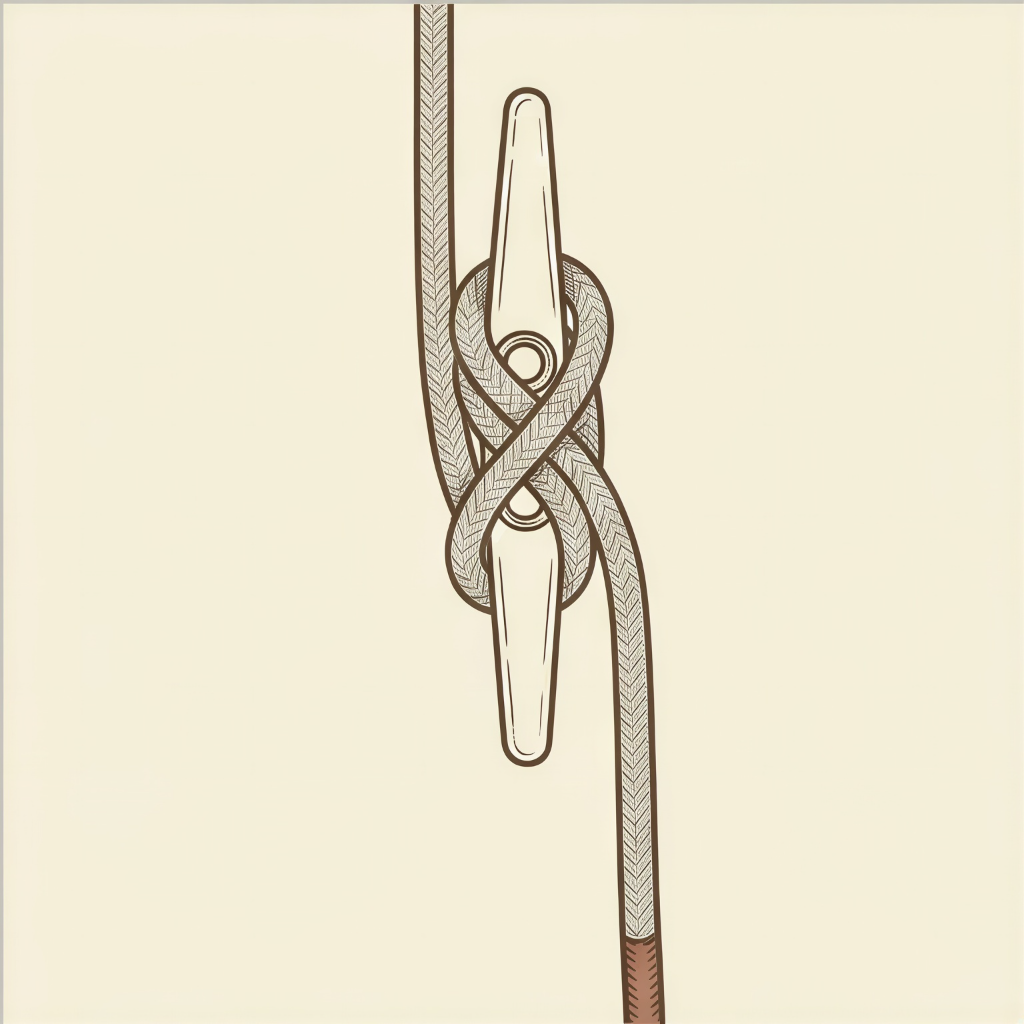
A finished cleat hitch
Type
Hitch (rope to a fitting)
Strength
As strong as the cleat it is tied to
Ease to untie
Instant — unwind, even under load
Best for
Dock lines, halyards, fender lines

“Round the base, figure-8, locking turn.”

Tie it step by step

  1. Take a full turn around the base of the cleatRound the base first — that turn takes the load, not the horns. Come in from the far side so the line leads fair.
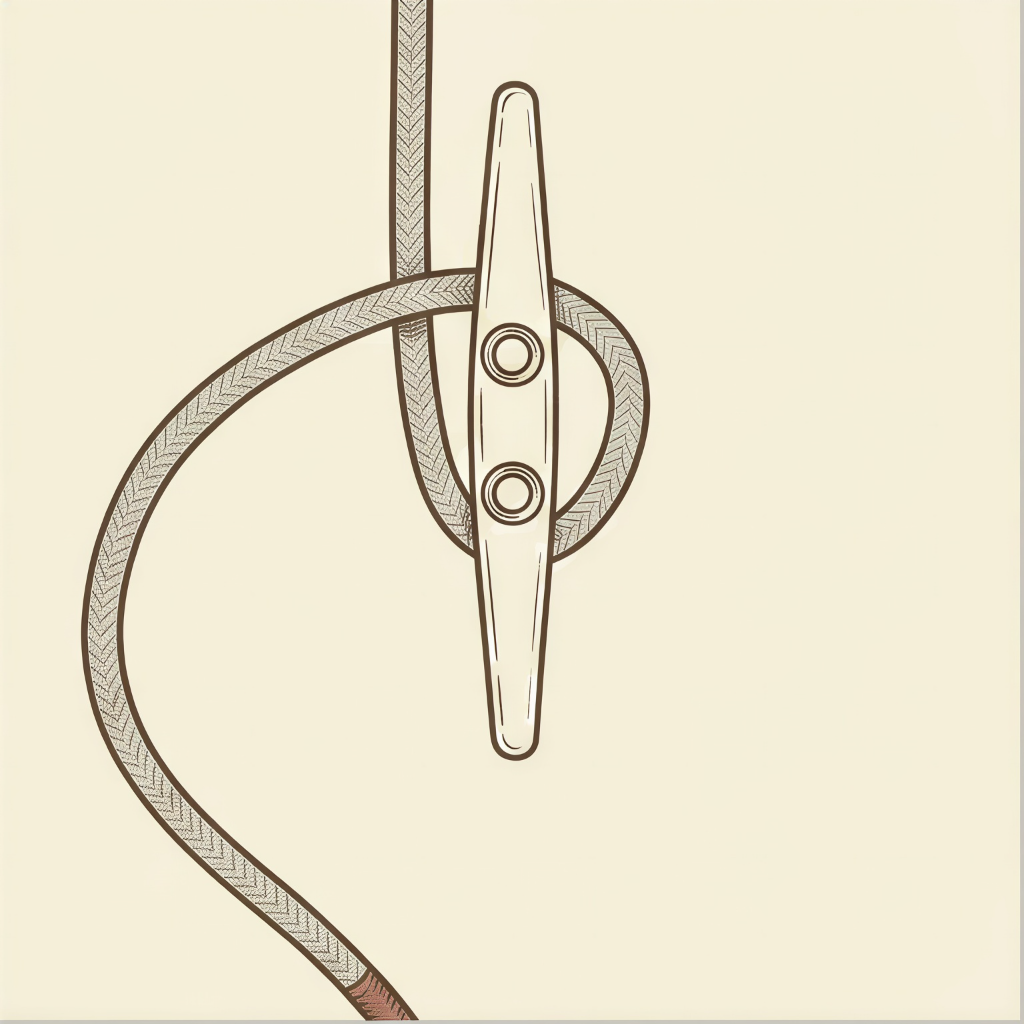
    Cleat hitch — take a full turn around the base of the cleat
  2. Cross over the top: figure-8 over one hornOver the centre, under the far horn. This is the first half of the figure-8.
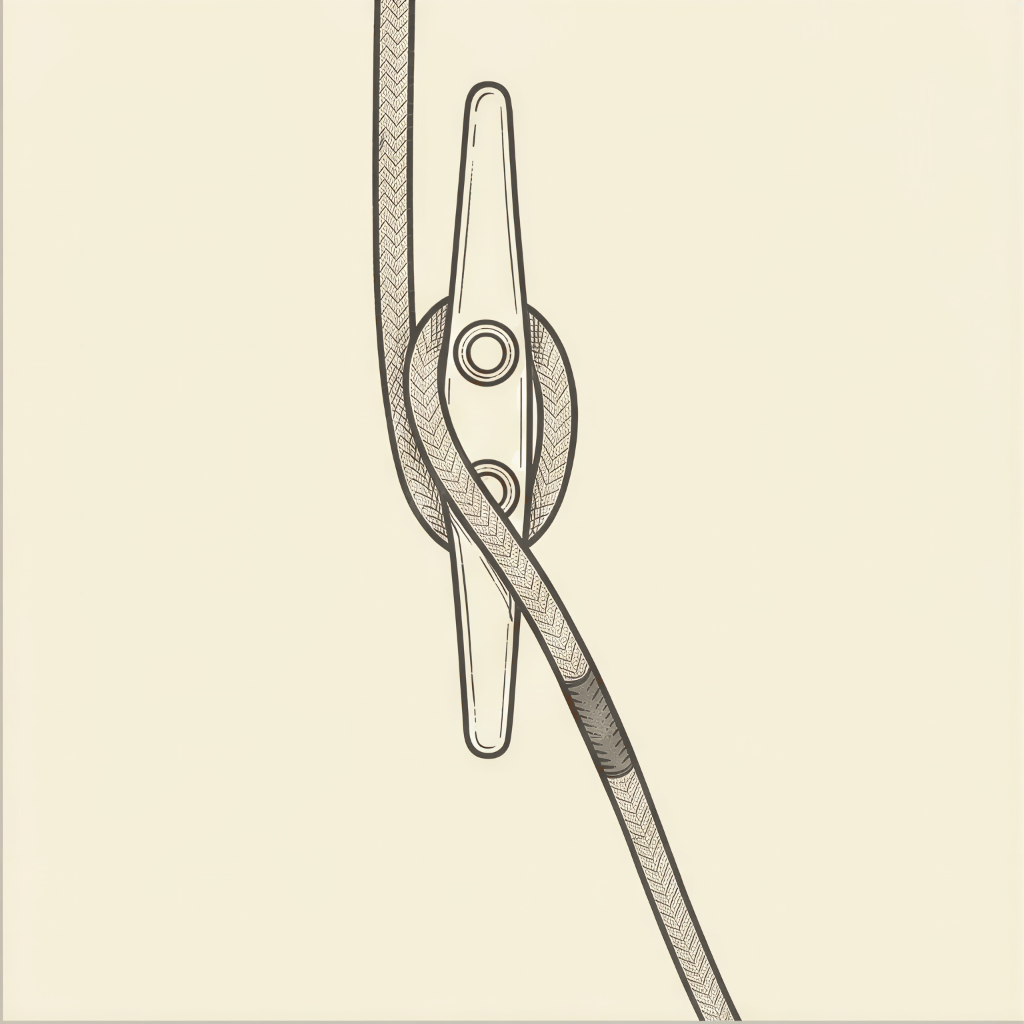
    Cleat hitch — cross over the top: figure-8 over one horn
  3. Second figure-8 crossing backOne more crossing gives the hitch its grip. Two figure-8s is plenty; more just wastes line.
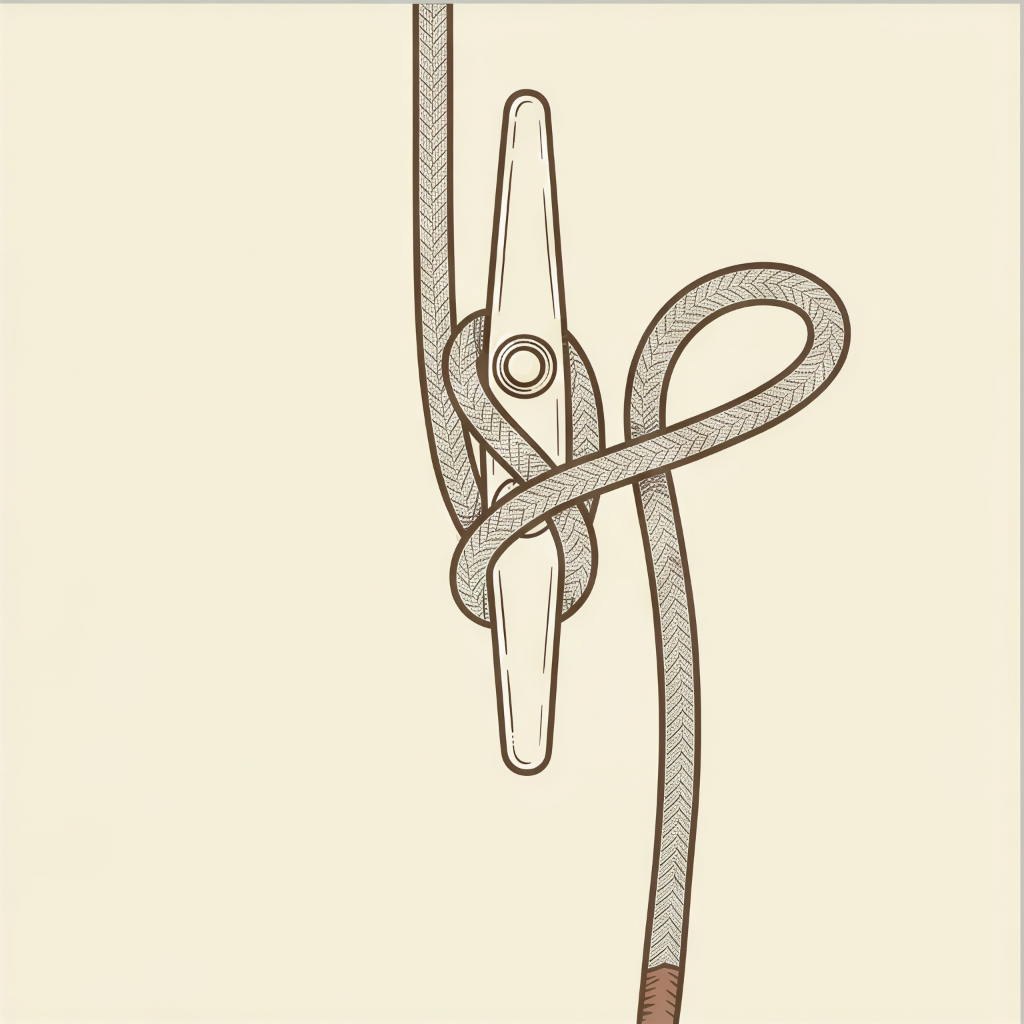
    Cleat hitch — second figure-8 crossing back
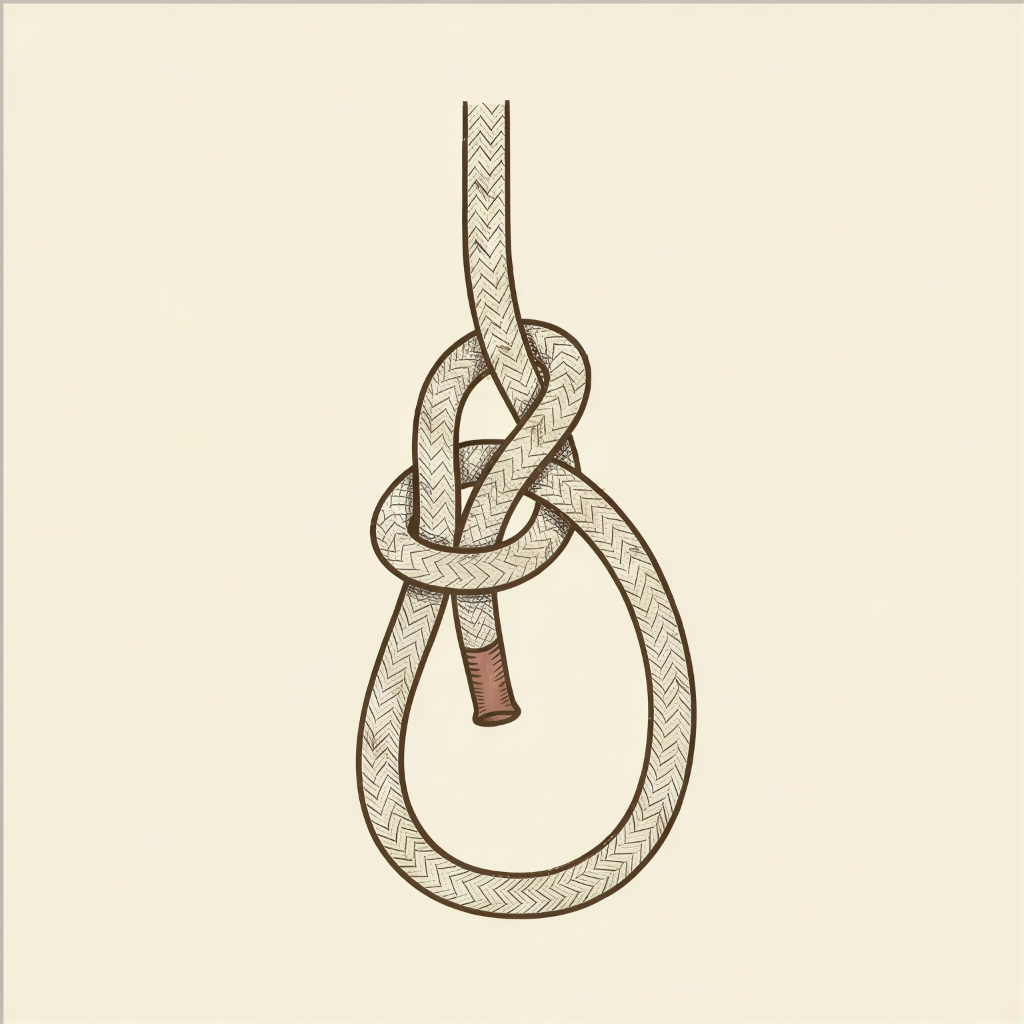
  4. Finish with a locking turnFlip a loop so the end tucks under itself, pointing back the way it came. Snug it down — it will hold and still release under load.
When you will use it on a boat

Every line that leaves the boat ends on a cleat: bow line, stern line, springs, the dinghy painter, a halyard at the mast. Get the first turn right and everything else follows — the round turn around the base absorbs the load, so you can hold a two-tonne boat with one hand while you finish the hitch.

Med mooring makes the point. You take a turn, let the line surge as the boat settles back, then lock it off. A line started on the horns instead of the base cannot be surged, and something has to give.

Watch out for

Do

  • Lead the line to the far side of the cleat first, so it leads fair
  • One locking turn, correctly oriented, and no more
  • On a halyard at the mast, coil and hang the tail so it cannot foul

Don’t

  • Never start on the horns — start with a full turn around the base
  • No half hitches or granny loops on a cleat; that is how lines jam
  • Do not pile on five figure-8s — two, then lock

Related knots

Questions people ask

Which way round should the locking turn go?

The tail should come out pointing back along the line, parallel to the last figure-8, so the crossing traps it. If the tail sticks out at an angle, you have flipped the loop the wrong way and the hitch can capsize under load.

How many figure-8s should a cleat hitch have?

Two. One round turn, two figure-8s, one locking turn. More turns do not add security — they add friction, and a jammed cleat is a real problem when you need to let go in a hurry.

Can you release a cleat hitch under load?

Yes, and that is the point. The locking turn lifts off, the figure-8s unwind, and the round turn at the base lets you surge the line under control rather than losing it all at once.

Is a cleat hitch the same as a cleat knot?

Same thing, different name. Sailors say cleat hitch because it is a hitch: a knot tied around an object rather than in the rope itself.

Can you tie it from memory?

Reading a knot and tying it on a pitching foredeck are different skills. Test the first one in two minutes, then close the gap with the course.